Setup
Install the package with pip
pip install ml-logger ml-dash
To make sure you use the newest version:
pip install ml-logger ml-dash --upgrade --no-cache
ML-Dash tutorial
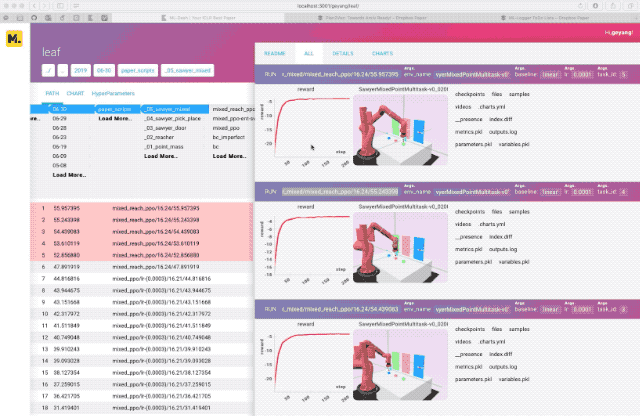
Launch the Dashboard Web-app
The dashboard is a web app. You can launch a static server to serve this web app via:
python -m ml_dash.app
Configuring the Dashboard server
The important thing is that you want to set the –host flag to 0.0.0.0 so that the server accepts http requests from any client. Not just limited to your localhost.
1763  python -m ml_dash.server -h
1764  python -m ml_dash.server --port 8090 --workers 4 --host 0.0.0.0 --logdir ~/ml-logger-debug
1765  python -m ml_dash.server --port 8090 --workers 1 --host 0.0.0.0 --logdir ~/ml-logger-debug

Configuring the Dashboard
- API URL need to contain http:// or https://.
- access token is currently not supported (leave empty)
- Username should be the root folder of your logging directory. For mine, it currently look like this
~>ubuntu: tree runs -L 3
runs
├── amyzhang
│   ├── fair
│   ├── plan2vec
│   └── plan2vec-experiments
├── episodeyang
│   ├── gmo-experiments
│   ├── leaf
│   ├── learning-to-learn
│   └── plan2vec
├── Live Plotting.ipynb
└── watch.py
Logging Your First Experiment!
For launch I use jaynes, with a thunk that configures the logging prefix. For now we can make it simple and just log something:
for advanced usage, take a look at this fairinternal repo: fairinternal/plan2vec
from ml_logger import logger

logger.configure(log_directory="http://<your-host>:<port>",
                 prefix="username/experiment/run-id")

for i in range(1000):
  logger.log(loss=1.01**-i, step=i, flush=True)
alternatively you can do (where “your root” begins with “file://”):
logger.configure(log_directory="your root", prefix="username/experiment/run-id")
If you want to log to a logging server, run something like these:
python -m ml_logger.server -h
python -m ml_logger.server --port 8081 --host 0.0.0.0 --data-dir ~/ml-logger-debug --workers 4
Old Tutorial [delete soon]
Now you can fire up an ipython console and start logging!
from ml_logger import logger
# ~> logging data to /tmp/ml-logger-debug
logger.configure('/tmp/ml-logger-debug')

logger.log(metrics={'some_val/smooth': 10, 'status': f"step ({i})"}, reward=20, timestep=i)
# flush the data, otherwise the value would be overwritten with new values in the next iteration.
logger.flush()
outputs ~>
╒════════════════════╤════════════════════════════╕
│       reward       │             20             │
├────────────────────┼────────────────────────────┤
│      timestep      │             0              │
├────────────────────┼────────────────────────────┤
│  some val/smooth   │             10             │
├────────────────────┼────────────────────────────┤
│       status       │          step (0)          │
├────────────────────┼────────────────────────────┤
│      timestamp     │'2018-11-04T11:37:03.324824'│
╘════════════════════╧════════════════════════════╛
from ml_logger import logger
# ~> logging data to /tmp/ml-logger-debug
logger.configure('/tmp/ml-logger-debug')

logger.log(metrics={'some_val/smooth': 10, 'status': f"step ({i})"}, reward=20, timestep=i)
### flush the data, otherwise the value would be overwritten with new values in the next iteration.
logger.flush()
╒════════════════════╤════════════════════════════╕
│       reward       │             20             │
├────────────────────┼────────────────────────────┤
│      timestep      │             0              │
├────────────────────┼────────────────────────────┤
│  some val/smooth   │             10             │
├────────────────────┼────────────────────────────┤
│       status       │          step (0)          │
├────────────────────┼────────────────────────────┤
│      timestamp     │'2018-11-04T11:37:03.324824'│
╘════════════════════╧════════════════════════════╛
Skip this if you just want to log locally. When training in parallel, you want to kickstart an logging server (Instrument Server). To do so, run:
python -m ml_logger.server --log-dir /home/yourname/ml-logger-debug --host 0.0.0.0 --port 8081
Use ssh tunnel if you are running on a managed cluster.
The default host is set to 127.0.0.1. This would prevent
external requests from being accepted. To allow requests from a
non-localhost client, set host to 0.0.0.0.
ml-logger uses params-proto to declaratively define the cli
interface. To view the help document, you can simply type
python -m ml_logger.server --help
(plan2vec) ➜  ~ python -m ml_logger.server --help

usage: -m [-h] [--data-dir DATA_DIR] [--port PORT] [--host HOST]
          [--workers WORKERS] [--debug]

optional arguments:
  -h, --help           show this help message and exit
  --data-dir DATA_DIR  The directory for saving the logs
  --port PORT          port for the logging server
  --host HOST          IP address for running the server. Default only allows
                       localhost from making requests. If you want to allow
                       all ip, set this to '0.0.0.0'.
  --workers WORKERS    Number of workers to run in parallel
  --debug              boolean flag for printing out debug traces